

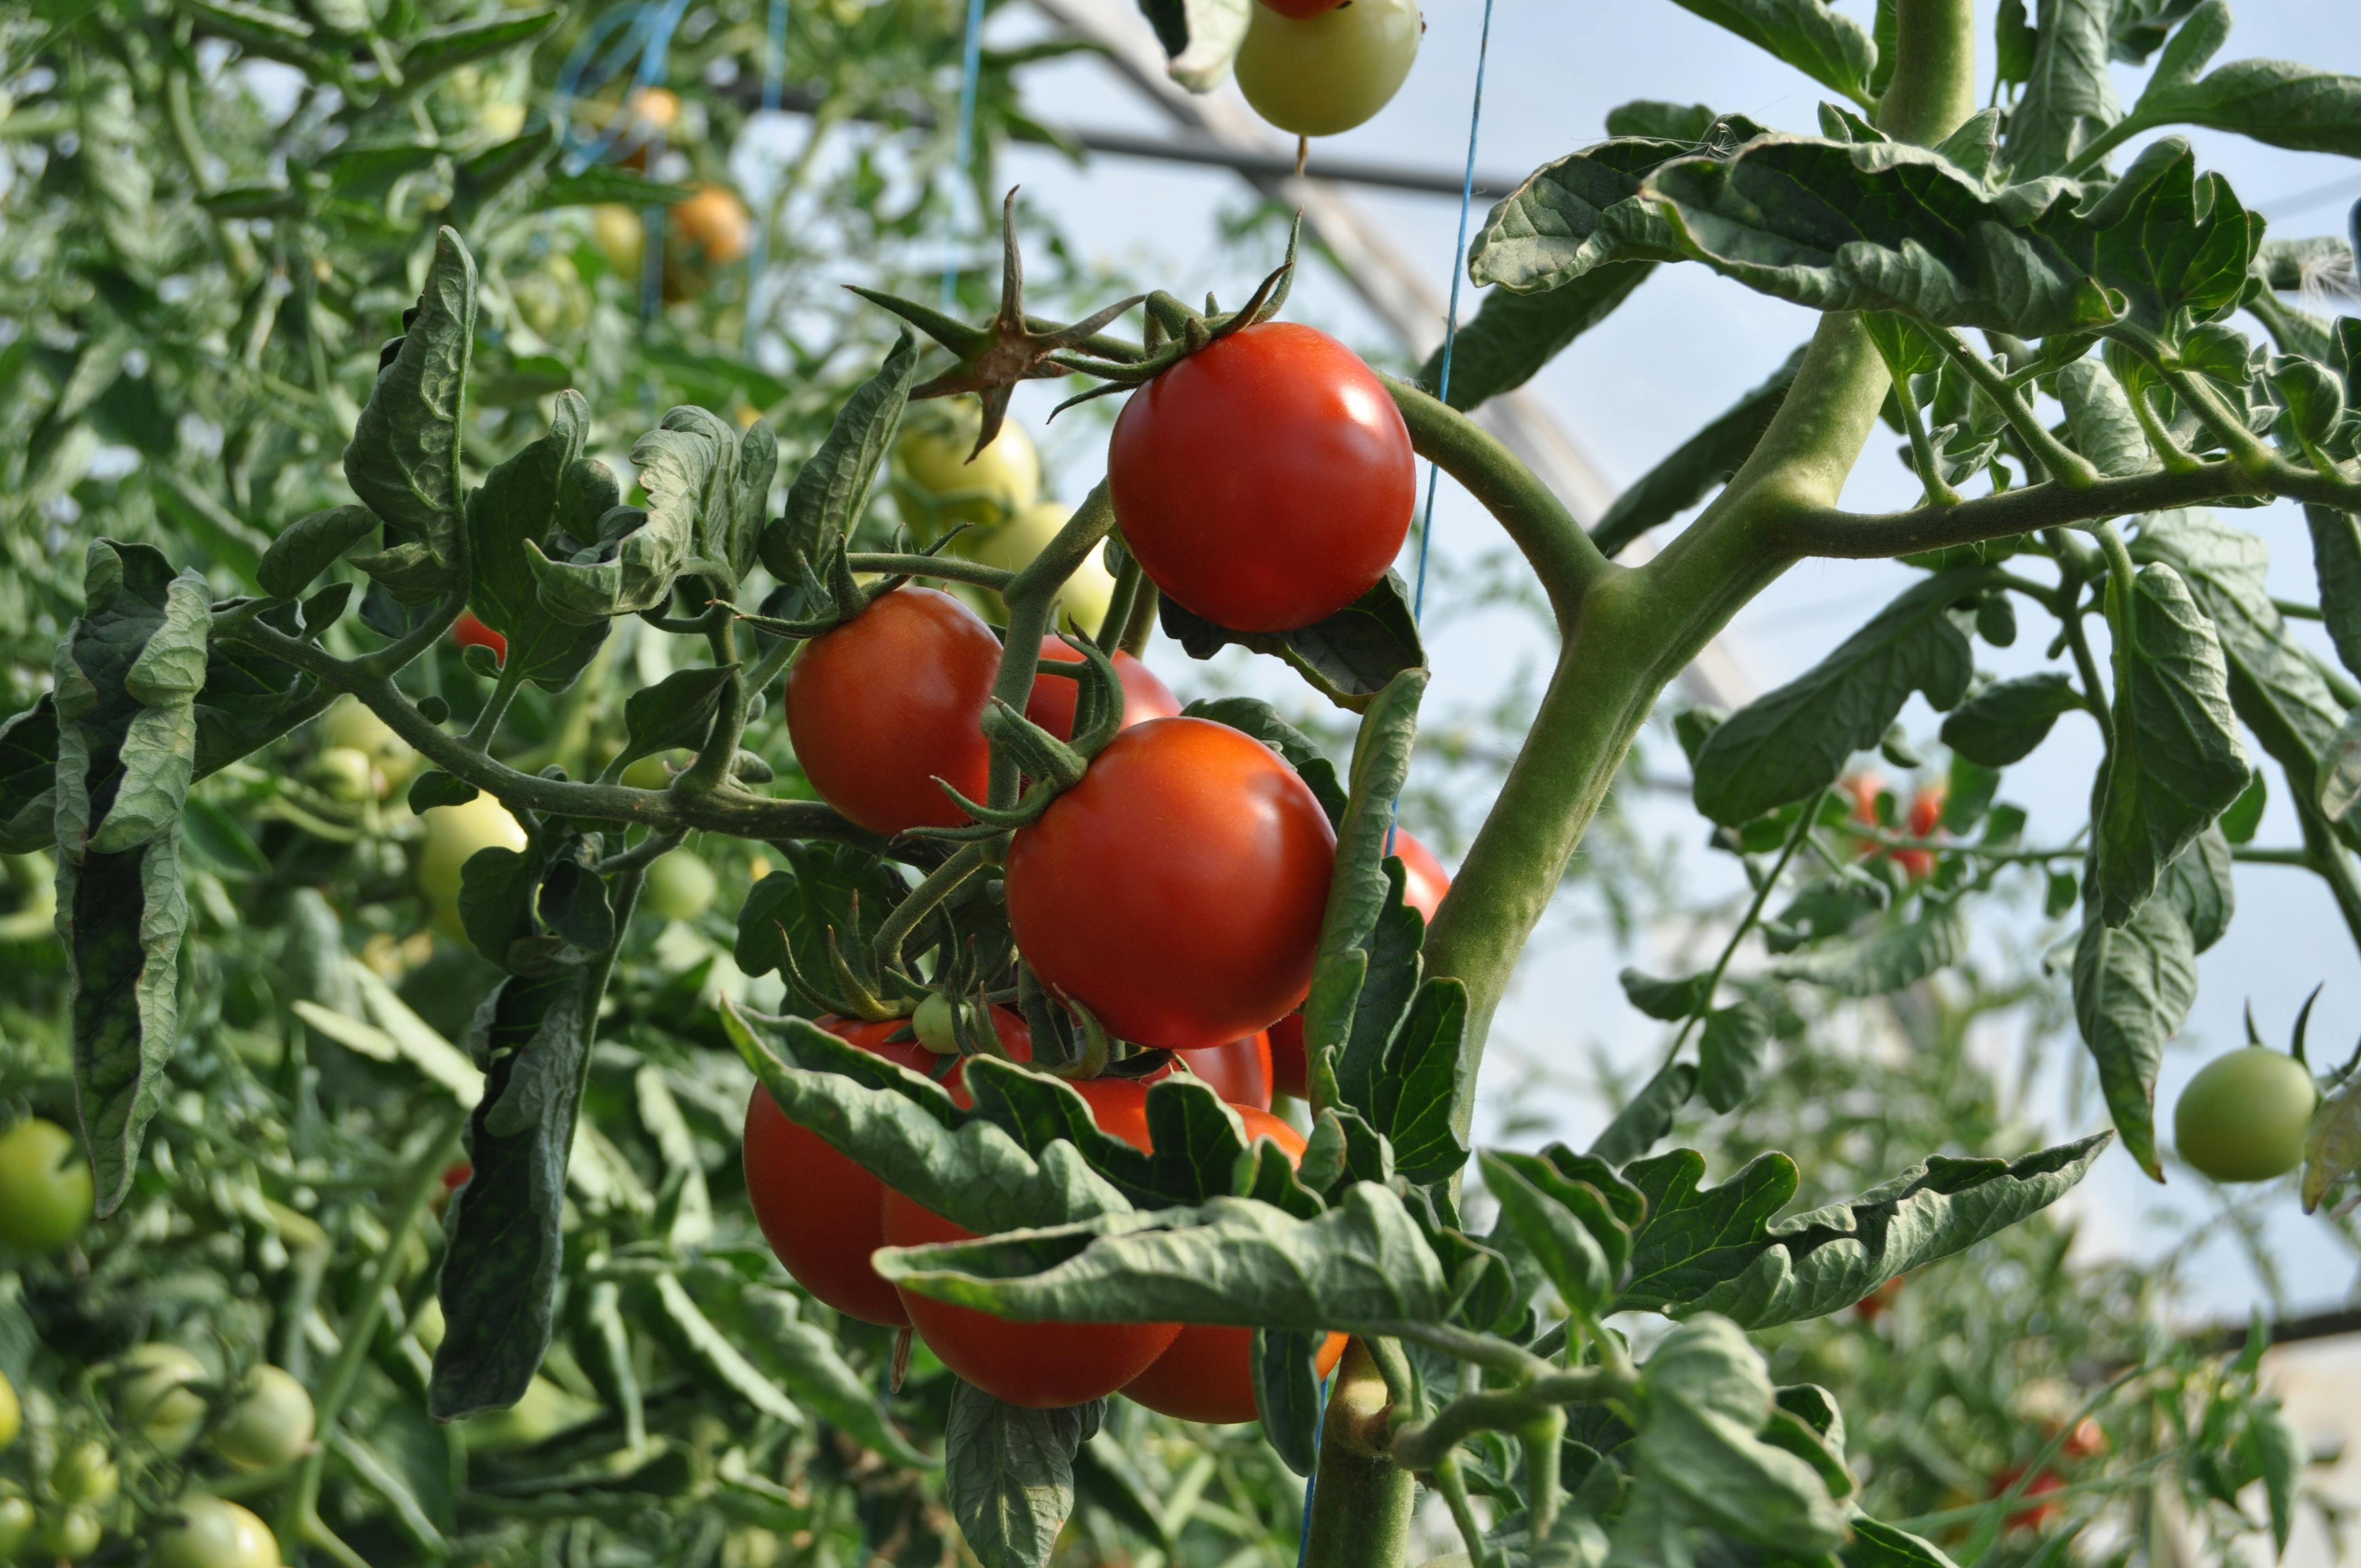
Ever craved that fresh-picked tomato flavor, bursting with sunshine and dripping with sweetness? Forget supermarket cardboard masquerading as fruit – imagine strolling into your own backyard and plucking a juicy gem straight off the vine. You don’t need a sprawling farm or years of experience, my friends. Growing your own tomatoes is simpler than you think!
So, ditch the store-bought blandness and join me on this delicious journey. This guide is your passport to summer (or any season, really!) overflowing with homegrown goodness: no fancy tools, no green thumbs required, just pure satisfaction guaranteed. We’ll explore everything from sunny spots to seed-starting secrets, watering wisdom to pest patrol, and of course, the oh-so-sweet reward of that first sun-warmed bite.
Ready to swap out grocery aisles for garden rows? Let’s get dirty – the tomato-growing kind of dirty, of course!
How to Choose the Right Tomato Varieties
Which Varieties Should We Choose?
When it comes to growing tomatoes in your home garden, the first step is choosing the right tomato varieties. There are two main types: determinate and indeterminate.
Determinate tomatoes are like the neat and tidy guests at a garden party. They grow to a certain height, set their fruit, and then call it a day. These are great for compact spaces or if you want a quick harvest.
Indeterminate tomatoes, on the other hand, are the party-goers that keep on celebrating. They continue growing and producing fruit until the frost arrives. It’s ideal if you’re looking for a continuous harvest throughout the season.
Furthermore, tomatoes prefer not to be too hot or not too cold but just right. Consider your local climate and choose varieties that thrive in your conditions.
If you’re in a cooler climate, go for varieties that have a shorter growing season. In warmer climates, look for heat-tolerant varieties.
Common Tomato Varieties for Home Gardens
Now, the fun part – choosing specific tomato varieties for your home garden. Here’s a shortlist to get you started:
- Early Girl: The overachiever of the tomato world. It matures quickly, perfect for those who can’t wait to taste their first homegrown tomato.
- Roma (Plum) Tomatoes: If you dream of homemade pasta sauce or sun-dried tomatoes, Romas are your go-to. They’re meaty and have fewer seeds.
- Cherry Tomatoes (Sun Gold, Sweet 100): Like candy in your garden. These little gems are perfect for snacking or adding a burst of flavor to salads.
- Beefsteak: The heavyweight champion. Big, juicy, and perfect for slicing on sandwiches or burgers.
- Heat-Tolerant Varieties (Phoenix, Solar Fire): For those scorching summer days, these varieties can handle the heat and keep on producing.
Remember, the best tomato variety for you depends on your taste preferences, local climate, and the space you have available. Don’t be afraid to mix and match – variety is the spice of life and your garden!

Steps to Plan and Prepare the Garden
#1. Selecting the Prime Tomato Spot
First, finding the ideal location for your tomato plants is crucial. They love sunlight, so pick a spot that gets at least 6-8 hours of it daily. Sunlight is the fuel for tomato flavor, so the more, the merrier. Also, make sure the soil drains well – tomatoes like their feet dry, not soggy.
Now, onto soil considerations. They prefer well-draining, loamy soil. If your soil is heavy clay, consider amending it with compost or sand to improve drainage. A pH between 6.0 and 6.8 is like the sweet spot for tomatoes, so keep that in mind when picking your garden plot.
#2. Preparing the Soil
Start by testing your soil pH. It’s a bit like checking the recipe before you start cooking. You can find affordable testing kits at your local garden center or Amazon. If the pH is off, adjust it with lime or sulfur – your tomatoes will appreciate the effort.
You should add some organic fertilizer to your soil. Mix in well-rotted compost or aged manure. This not only adds essential nutrients but also improves the soil structure. If your soil needs an extra boost, consider a balanced fertilizer.
#3. Choosing the Right Containers for Tomatoes
For those with limited space or a penchant for container gardening, choosing the right containers is key. Make sure your containers have drainage holes – tomatoes don’t like wet feet. Fill them with a high-quality potting mix enriched with organic matter.
Container gardening can be a game-changer for small spaces or if you want to move your tomatoes around for optimal sunlight.

How to Grow Tomatoes
Next, we’ll start to grow our tomatoes. There are two methods: starting from seeds and starting from seedlings. So, let’s move on to the first method.
Starting Tomatoes from Seeds
Why bother starting from seeds? Well, it’s like having a front-row seat to the entire life cycle of your tomatoes. You get to witness the magic from seed to sprout, and it allows you to choose from a wider variety of tomato types. Plus, it’s budget-friendly and gives you a head start on the growing season.
When it comes to starting tomato seeds indoors, timing is everything. Start your seeds about 6-8 weeks before the last expected frost in your area. This gives your tomatoes a cozy indoor space to germinate and grow strong before facing the outdoor elements.
Step-by-Step Guide
- Seed Selection: Start with quality seeds. Choose varieties that suit your taste and climate. Look for reputable seed suppliers; you’re off to a great start.
- Germination Process: Plant your seeds in a seed-starting mix, and keep them warm (around 75-80°F or 24-27°C). Once they sprout, move them to a sunny spot or under grow lights, maintaining a slightly cooler temperature.
- Transplanting Seedlings: Now, your little tomato stars are ready for a bigger stage. Once they have a couple of sets of true leaves, transplant them into larger containers. Gradually introduce them to outdoor conditions before transplanting them into the garden.

Transplanting Seedlings to the Garden
First, give your tomatoes some elbow room. You don’t want your tomatoes stepping on each other’s toes, right?
Plant them about 18 to 24 inches apart in rows with 36 inches between rows. This not only helps with air circulation but also ensures they have enough space to spread their branches and bask in the sunlight.
Consider the height of each variety and place the taller ones on the north or west side of your garden. This way, they won’t cast shade on their shorter companions.
Transplanting Techniques
To get those seedlings into their new home with minimal stress, you can follow these steps:
- Prepare the Soil: Dig a hole slightly deeper than the seedling’s root ball and twice as wide. Mix in some compost to give your tomatoes a nutrient-rich welcome.
- Gentle Extraction: Carefully remove the seedlings from their containers. Hold them by the leaves, not the delicate stems.
- Planting at the Right Depth: Set the seedlings in the holes, burying them slightly deeper than they were in the pots. This encourages a strong root system.
- Watering In: After planting, water them in a well. This helps settle the soil and ensures good root-to-soil contact.
Remember, water your newly transplanted seedlings consistently. Keep the soil consistently moist but not waterlogged. You can give your tomatoes a boost with a balanced fertilizer a few weeks after transplanting. This helps them settle in and start producing those luscious fruits.
See More: How To Grow Vegetables At Home: A Step-by-Step Guide for Beginners
5 Tips to Care for Tomato Plants
- Watering: Water consistently and deeply, especially during dry spells. It’s like ensuring they stay hydrated to perform at their best. Consider using a soaker hose or drip irrigation to keep the foliage dry. This reduces the risk of diseases like blight. Water early in the day so your plants have time to dry before nightfall.
- Mulching: Mulch is like a cozy blanket for your tomatoes – it keeps them warm and protected. Spread a layer around the base, leaving a few inches around the stem. This helps retain moisture, suppress weeds, and regulate soil temperature.
- Pruning: Remove the lower branches, especially those touching the ground. This improves air circulation and reduces the risk of diseases.
- Staking: Staking prevents sprawling, keeps the fruits off the ground, and makes harvesting a breeze. It’s like giving your tomatoes a support system to help them stand tall.
- Fertilizing: Start with a balanced fertilizer when you first plant and again when the first fruits appear. Around mid-season, provide another round of fertilizer. This keeps them going strong through the heavy fruiting period. Be cautious not to overdo it – too much fertilizer can lead to lush foliage but fewer fruits.
Common Pests and Diseases in Tomatoes & How to Prevent Them
4 Common Tomato Pests
- Aphids: These tiny, sap-sucking insects can multiply like crazy. Look for clusters of them on new growth.
- Hornworms: Big, green, and hungry, these caterpillars can munch through your plants in no time.
- Whiteflies: Small and white, they gather on the undersides of leaves, sucking the life out of your tomatoes.
- Spider Mites: Almost microscopic, these little troublemakers leave fine webs on your plants.
Keep a close eye on your tomato plants. If you notice distorted leaves, discoloration, or tiny pests, it’s time to take action.
Natural and Organic Pest Control Methods
To evict these unwanted guests, you can use natural and organic methods as below:
- Beneficial Insects: Introduce allies like ladybugs, parasitic wasps, and predatory beetles. They feast on the pests, maintaining a natural balance.
- Neem Oil: A superhero in the organic gardening world, neem oil disrupts the pests’ life cycle and keeps them at bay.
- Companion Planting: Planting basil, marigolds, or nasturtiums near your tomatoes can act as a natural deterrent to certain pests.
- Diatomaceous Earth: This powdery substance is like a kryptonite for pests. Sprinkle it around your plants, and it’ll dehydrate and defeat crawling insects.
How to Recognize and Prevent Common Tomato Diseases
- Early Blight: Look for dark spots on lower leaves. To prevent this, water at the base and avoid overhead watering.
- Late Blight: This one’s a bit tricky. Watch for brown spots with a white ring. Improve air circulation and use copper-based fungicides.
- Septoria Leaf Spot: Identified by small, dark spots with a lighter center. Remove infected leaves and apply copper fungicides preventatively.
Besides, you can select disease-resistant varieties, like giving your plants an extra layer of armor. Here are a few:
- Mountain Magic: Resistant to many diseases, including early and late blight.
- Defiant: A champion against late blight and other common diseases.
- Celebrity: Known for its resistance to many pests and diseases.
Common Issues in Your Tomato Garden
Addressing Yellowing Leaves
Yellowing leaves can be a bit like a red flag waving in your garden. If you spot this, consider the following:
- Nutrient Deficiency: It’s often a sign that your tomatoes need a nutritional boost. Try adding a balanced fertilizer to replenish those essential nutrients.
- Watering Woes: Overwatering or underwatering can lead to yellowing. Check the soil moisture. If it’s consistently wet, cut back on watering. If it’s dry, give your plants a good drink.
- Pests at Play: Sometimes, tiny pests like aphids or spider mites can be the culprits. Keep a close eye, and if you spot any unwanted visitors, use natural pest control methods to show them the way out.
Dealing with Blossom End Rot
Oh, the dreaded blossom end rot – it’s like a bad dream for tomato growers. But fear not, we can tackle it:
- Calcium Deficiency: Blossom end rot is often a result of calcium deficiency. Ensure your soil has enough calcium, and consider adding crushed eggshells or calcium-rich amendments.
- Consistent Watering: Fluctuations in soil moisture can contribute to this issue. Maintain a consistent watering schedule to keep the soil evenly moist.
- Mulch Magic: Mulching around your plants helps regulate soil moisture and temperature, creating a more stable environment for your tomatoes.
Solving Issues Related to Watering
Finding the right balance in watering is a bit like a delicate dance. Here’s how to troubleshoot:
- Overwatering Woes: If your soil feels constantly soggy, it’s a sign of overwatering. Improve drainage by adding organic matter to the soil and reduce watering frequency.
- Underwatering Blues: On the flip side, if the soil feels dry and your plants are wilting, you might be underwatering. Adjust your watering schedule to keep the soil consistently moist.
- Smart Watering Practices: Consider watering in the morning to allow the plants to absorb moisture before the heat of the day. This helps prevent both overwatering and underwatering issues.
Final Thoughts: Growing Your Own Tomatoes Isn’t Tricky
From sprout to sun-kissed splendor, we’ve journeyed through the delightful world of homegrown tomatoes! By now, your little seedlings should be basking in the sunshine, reaching for the sky, and dreaming of becoming juicy orbs of deliciousness. Relax, enjoy the process, and watch your tomato jungle flourish.
As your plants grow, keep showering them with love (and maybe a little fertilizer and water!). Soon, those vibrant blooms will give way to tiny green fruits, each one a promise of summery goodness to come. Tend to them gently, like nurturing little miracles, and before you know it, you’ll be holding the first sun-warmed tomato, fresh from your own backyard.
Take a moment to savor that bite. It’s not just a burst of flavor; it’s a testament to your hard work, patience, and love. You’ve co-created something magical, a tiny piece of summer sunshine you can hold in your hand. Share it with loved ones, savor it in salads, or simply bask in the quiet satisfaction of knowing you grew it yourself.


