

Orchids have always captivated me with their stunning blooms and air of elegance. From the cascading phalaenopsis with its delicate butterfly-like flowers to the vibrant cymbidium with its bold, architectural sprays, these plants offer a truly unique and eye-catching addition to any home.
But orchids also carry a bit of a reputation for being fussy and difficult to keep alive. The truth is, with a little know-how, these beauties can thrive under your care! In this beginner’s guide to orchid care, I’m going to dispel the myths and share some simple secrets to ensure your orchid flourishes and rewards you with season after season of breathtaking blooms. So, get ready to unlock the secrets to success and witness the magic of these captivating plants unfold in your own home.
How to Choose Your Orchid: A Perfect Match for Your Home
Now that we’ve established that orchids are more approachable than you might think, let’s delve into choosing the perfect one for your space. The key here is to find a variety that thrives in the conditions you can offer. Here are some beginner-friendly superstars to consider:
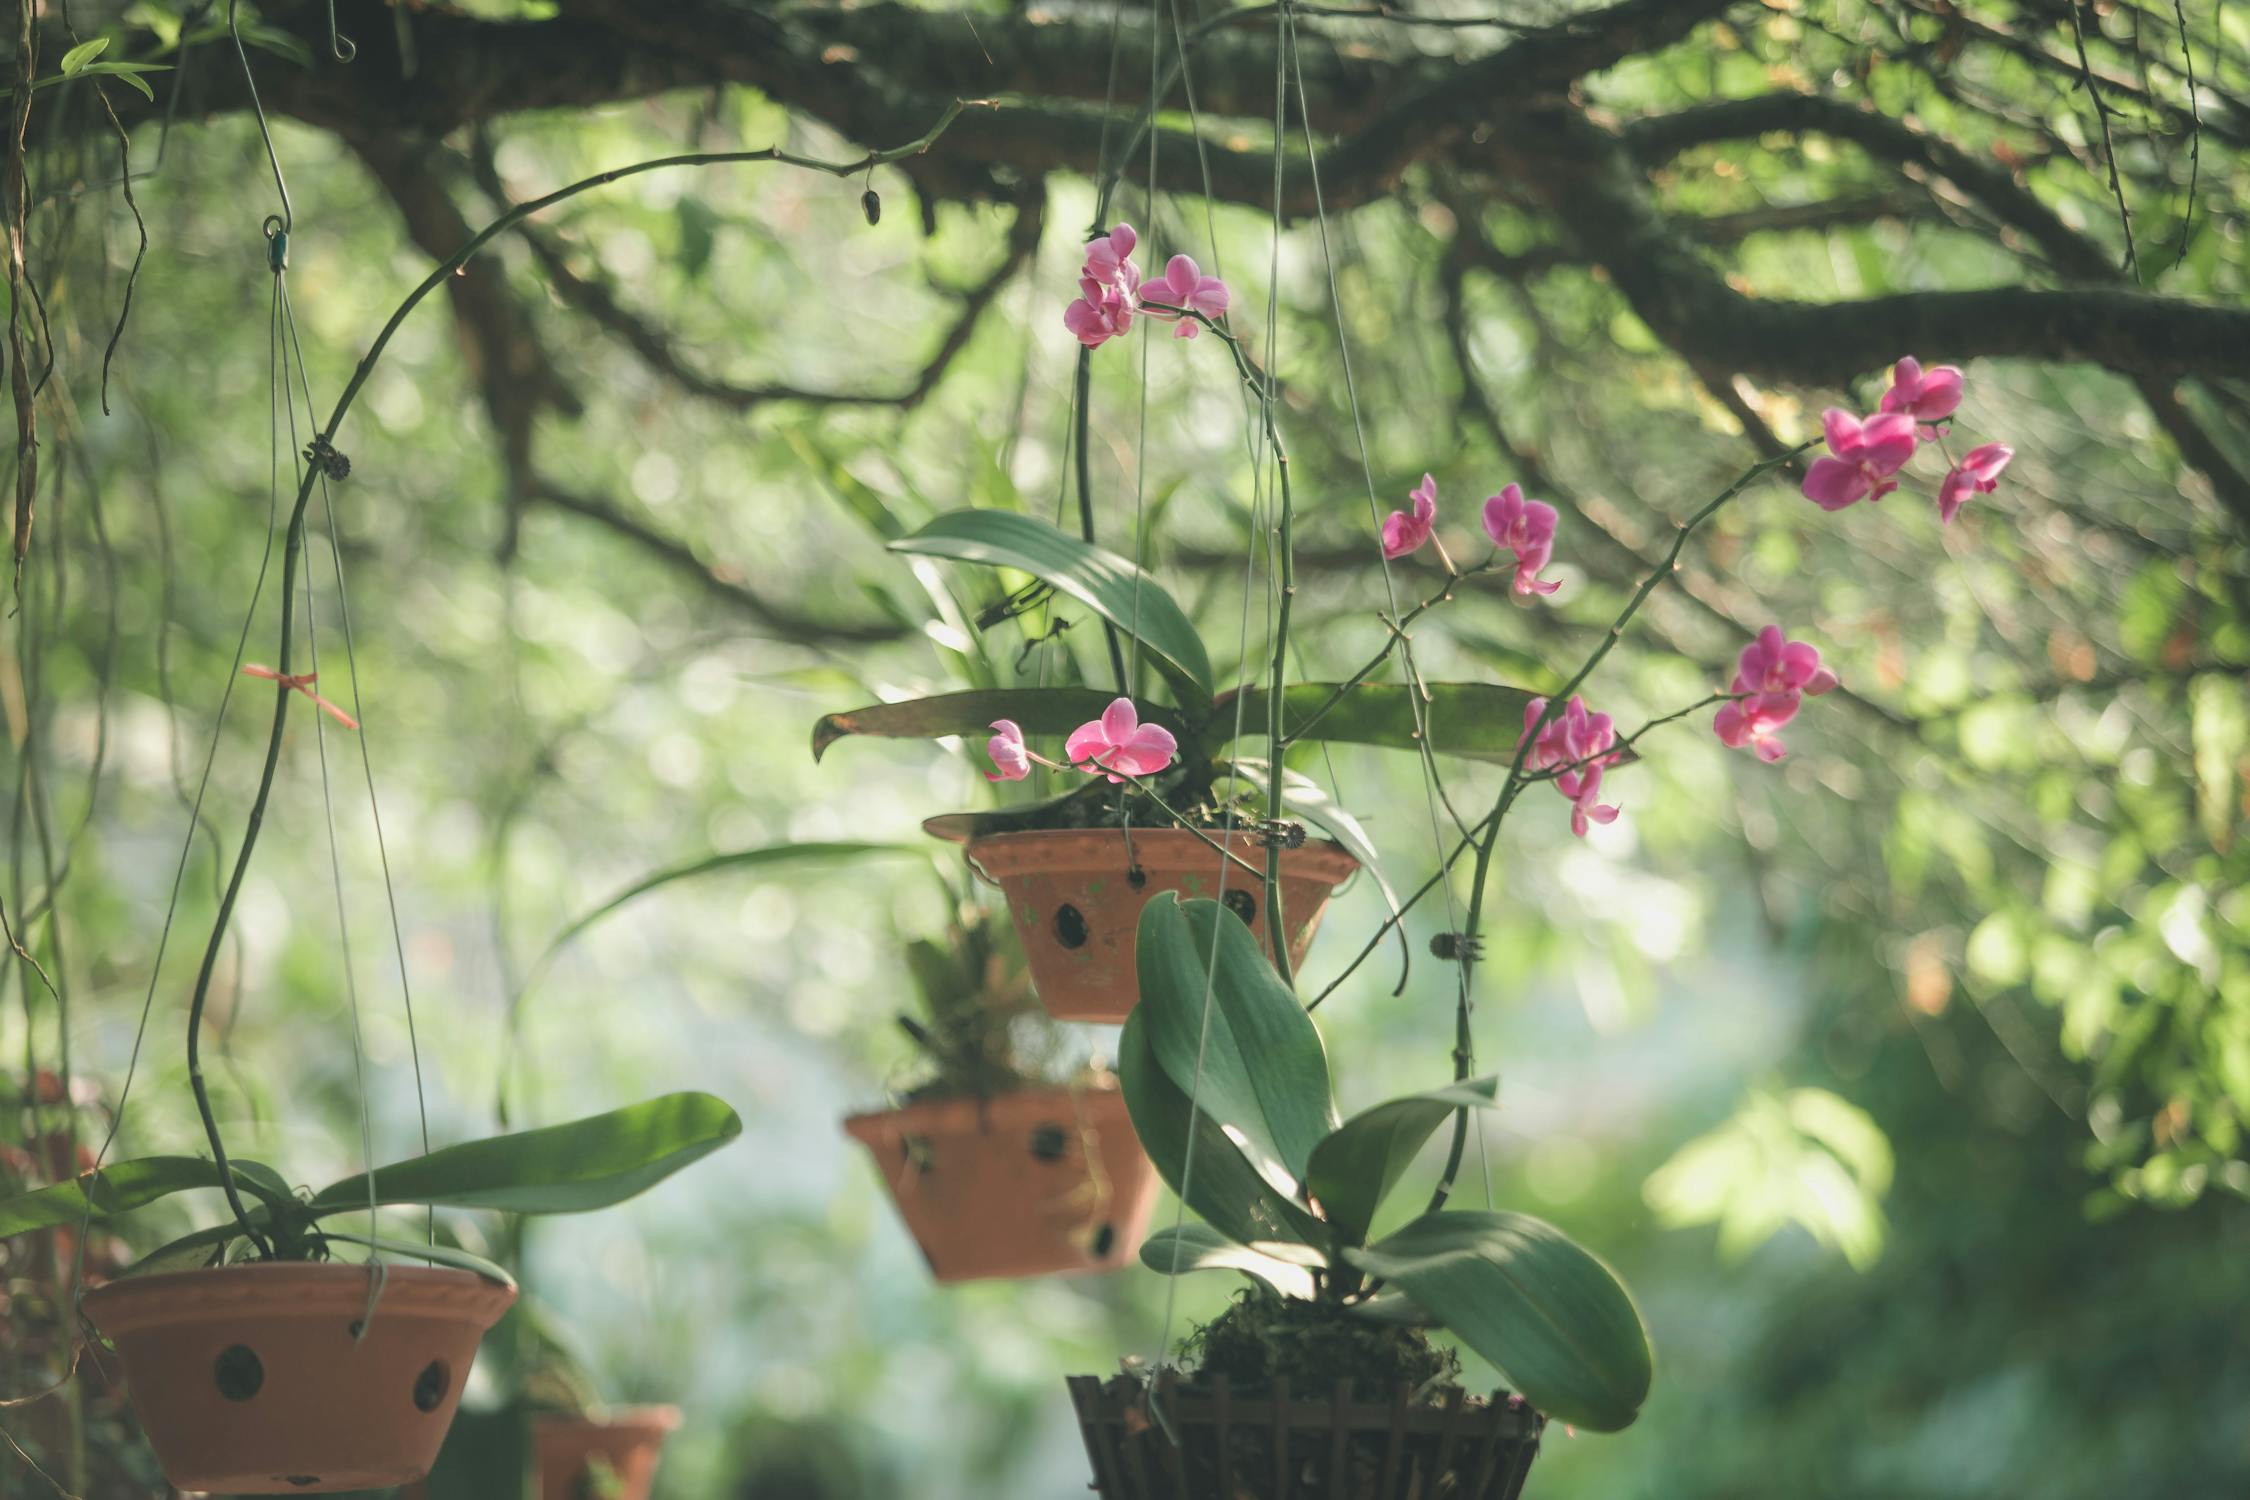
- Phalaenopsis (Moth Orchid): This is arguably the most popular orchid for a reason. Phalaenopsis boasts stunning, long-lasting blooms that come in a wide range of colors, from classic white to vibrant purples and pinks. They’re tolerant of a variety of lighting conditions (indirect sunlight is best) and require minimal fuss, making them ideal for first-time orchid owners.
- Dendrobium: This diverse genus offers a wider range of shapes and sizes compared to phalaenopsis. You’ll find dendrobiums with cascading sprays of dainty blooms or bold, single flowers. Most dendrobiums prefer slightly brighter light than phalaenopsis, but they’re still quite adaptable.
- Cymbidium: For a touch of drama, cymbidiums might be your pick. These orchids produce long-lasting flower spikes in a range of colors, from soft pastels to rich yellows and oranges. Cymbidiums tend to be a bit larger than phalaenopsis and dendrobiums, so keep that in mind when choosing your spot.
Beyond the variety, there are a few physical signs to look for when selecting a healthy orchid. The roots should be plump and green, signifying they’re actively taking in moisture. The plant itself should have 2-3 healthy leaves, and ideally, show signs of new growth or even a flower bud or a recently spent flowering stem. These indicators suggest the orchid is happy and has the potential to thrive in your care.

How to Create the Perfect Environment for Your Orchid
Unlike their desert-dwelling cousins, most orchids hail from the dappled shade of tropical rainforests. This means they prefer indirect sunlight. Think of them basking in the gentle morning light filtering through leaves, not baking under the harsh midday sun. So, an east or west-facing window is an ideal spot for your orchid. South-facing windows can get too intense, especially in the afternoon, while north-facing ones might not provide enough light for healthy growth.
Remember those lush, tropical rainforests? Well, orchids love humidity too! Ideally, aim for a range of 60-80% humidity. If your home tends to be on the drier side (especially during winter), there are a few tricks to create a more spa-like environment for your orchid. A simple solution is to place your orchid on a pebble tray filled with water. As the water evaporates, it raises the humidity around the plant. Alternatively, you can invest in a humidifier to create a more consistent level of moisture in the air.
Temperature also plays a role in your orchid’s happiness. They generally prefer a comfortable range of 60-80°F. So, basically, if you’re feeling comfortable in your clothes, your orchid likely is too! Avoid placing your orchid near drafts or heat vents, as these can cause fluctuations in temperature and stress the plant.
Finally, let’s talk about the foundation of your orchid’s well-being – its potting mix. Regular potting soil just won’t do. Orchids are epiphytes, meaning they grow in the wild by clinging to the bark of trees rather than in soil. To mimic this natural environment, we use a special orchid potting mix. This mix is typically made up of chunky components like orchid bark, sphagnum moss, and perlite. These materials provide excellent drainage and aeration, allowing the orchid’s roots to breathe and preventing them from rotting due to excess moisture.

How to Care for Your Orchid
Watering is perhaps the biggest concern for new orchid owners. After all, we don’t want to drown our precious plants, but we also don’t want them to dehydrate. The key here is to avoid overwatering at all costs. Unlike most houseplants that thrive in consistently moist soil, orchid roots actually prefer to dry out slightly between waterings.
The good news is that orchids themselves will give you clues as to when they need a drink. The best way to check is by taking a peek at the roots. Healthy orchid roots are typically plump and green. When they turn a silvery-gray color, it’s your cue to water. Another trick is to gently squeeze the base of the pseudobulb (the fleshy bulb at the base of the leaves). If it feels slightly shriveled, it’s watering time.
Once you’ve determined your orchid is thirsty, there are a couple of effective watering methods. One popular technique is to soak the pot. Simply place the entire orchid pot in a container filled with lukewarm water (avoid cold water) for 10-15 minutes. This allows the potting mix to absorb moisture thoroughly. Let the pot drain completely before placing it back in its decorative container.
While orchids don’t require frequent feeding, they do appreciate a boost during their active growing season. I recommend using a specially formulated diluted orchid fertilizer once every two to four weeks. Remember, less is always more when it comes to fertilizing orchids. Excess fertilizer salts can build up in the pot, damaging the roots. To prevent this, occasionally flush the pot with plain water to wash away any accumulated salts. Simply flush the pot by running lukewarm water through it for a few minutes until water runs freely out the drainage holes.
What to Do with Your Orchid After Blooming for Encouraging New Flowers
Witnessing your orchid erupt in a cascade of beautiful blooms is a truly rewarding experience. But what happens after the last flower fades?
The first step is to prune the flower spike. Locate the lowest bloom on the stem and simply cut the spike just below that point with a clean, sharp pair of shears. Don’t be afraid to snip! This encourages the orchid to focus its energy on producing new growth, rather than putting its resources into a spent flower spike.
Following the blooming period, it’s also beneficial to provide your orchid with a bit of a rest period. This doesn’t mean complete neglect, but you can slightly reduce watering and fertilizing frequency. Think of it as a time for your orchid to recharge and gather its strength for the next blooming cycle.
You might notice some slower growth during this time, but that’s perfectly normal. Just be patient and continue providing your orchid with the basic care it needs, and soon you’ll be rewarded with new shoots and the promise of another breathtaking display of blooms.

Orchid Care Tips: Keeping Your Orchid Thriving Long Term
Repotting
As your orchid matures, it may eventually outgrow its pot or the potting mix might start to break down. Signs that your orchid needs a new home include roots circling the pot or visible from the drainage holes, and a loose or compacted potting mix.
The ideal time to repot is usually in the spring, when new growth begins. There are resources available online or at your local nursery to guide you through the repotting process, but don’t worry, it’s not brain surgery!
Common problems
Just like any houseplant, orchids can be susceptible to a few common issues. Root rot is a concern if your orchid sits in constantly soggy conditions. Remember, healthy orchid roots are plump and green, while mushy or brown roots indicate rot. If you encounter this, carefully remove the orchid from its pot and address the affected roots.
Another potential foe is pests like mealybugs or scale. These tiny insects can suck the sap from your orchid, weakening the plant. Thankfully, there are natural and organic solutions available to keep these pests in check.
The key to dealing with any orchid issue is early detection. Regularly inspect your plant and address any concerns promptly. With a little knowledge and observation skills, you’ll be able to identify and address most orchid problems before they become major setbacks.
Remember, growing orchids is a journey, and there will be moments of learning along the way. But with the right care and a sprinkle of patience, you’ll be rewarded with a stunning, long-lasting floral display that will bring a touch of the tropics into your home. Happy orchid growing!


